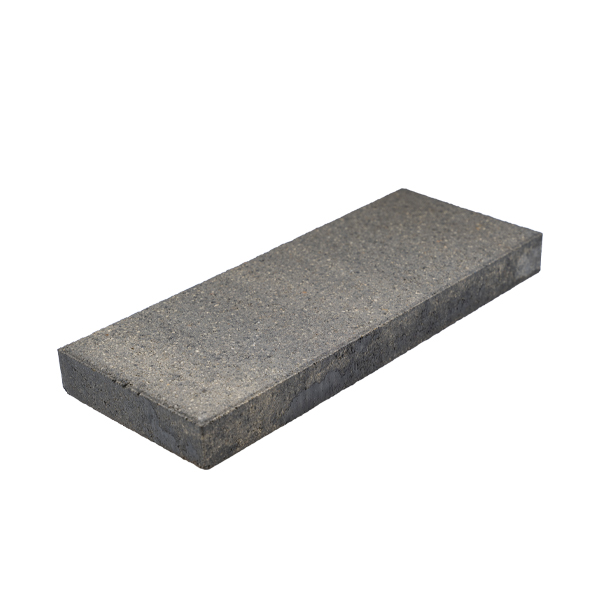
Cover plate DF3 block FINI
Height 5cm
length 5cm
width 20cm
Product weight 11kg
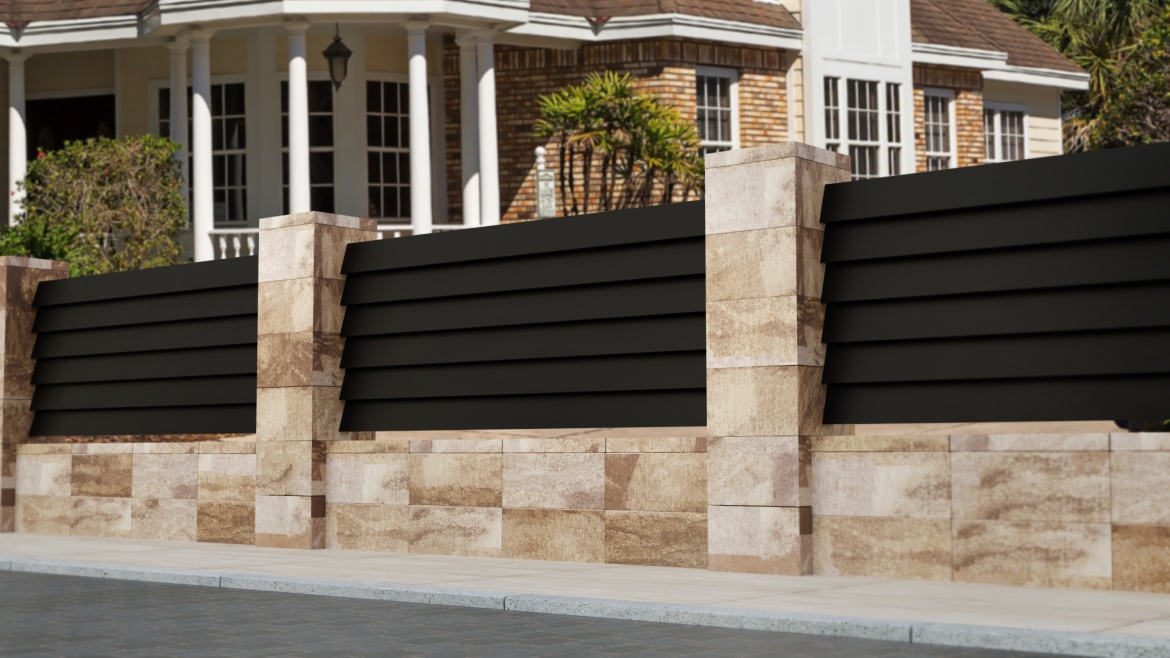
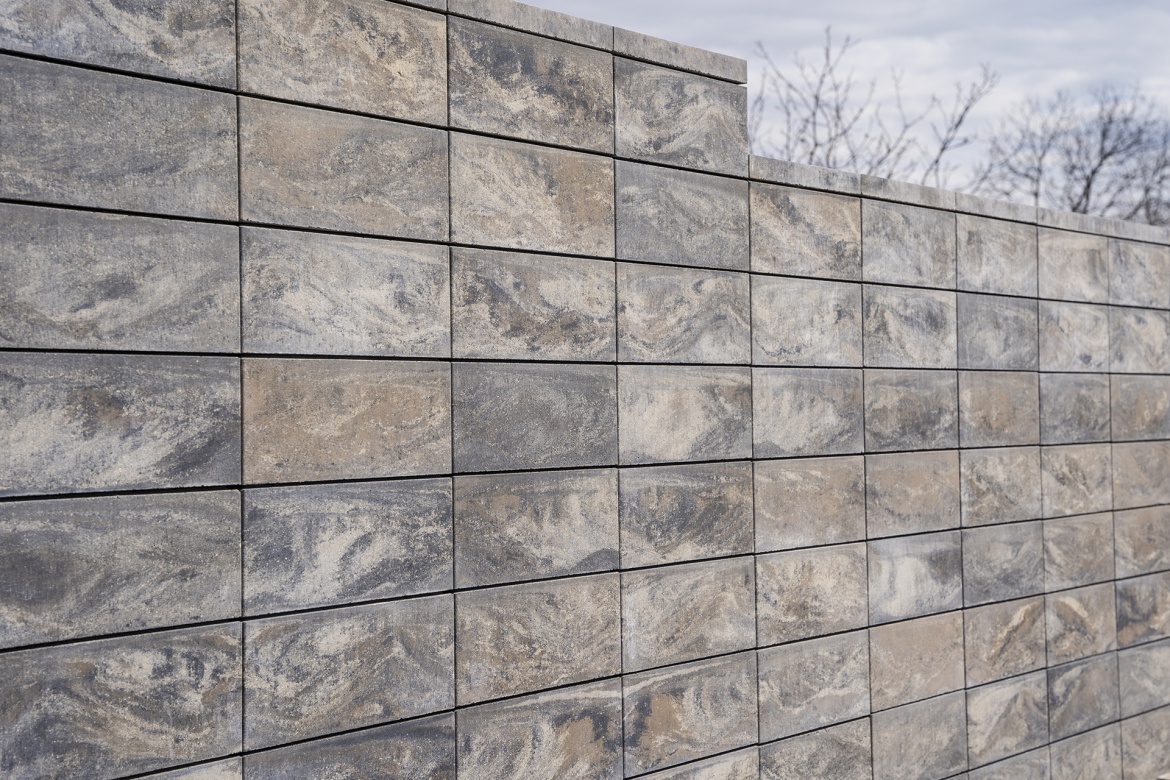
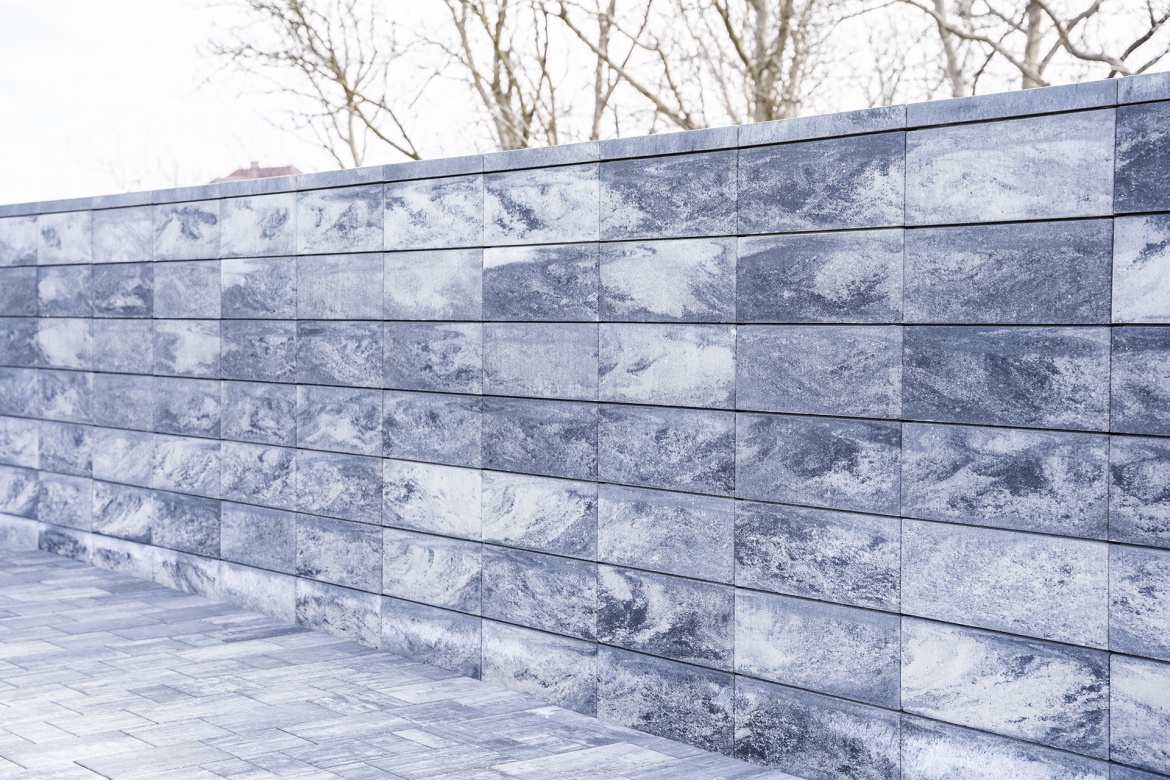
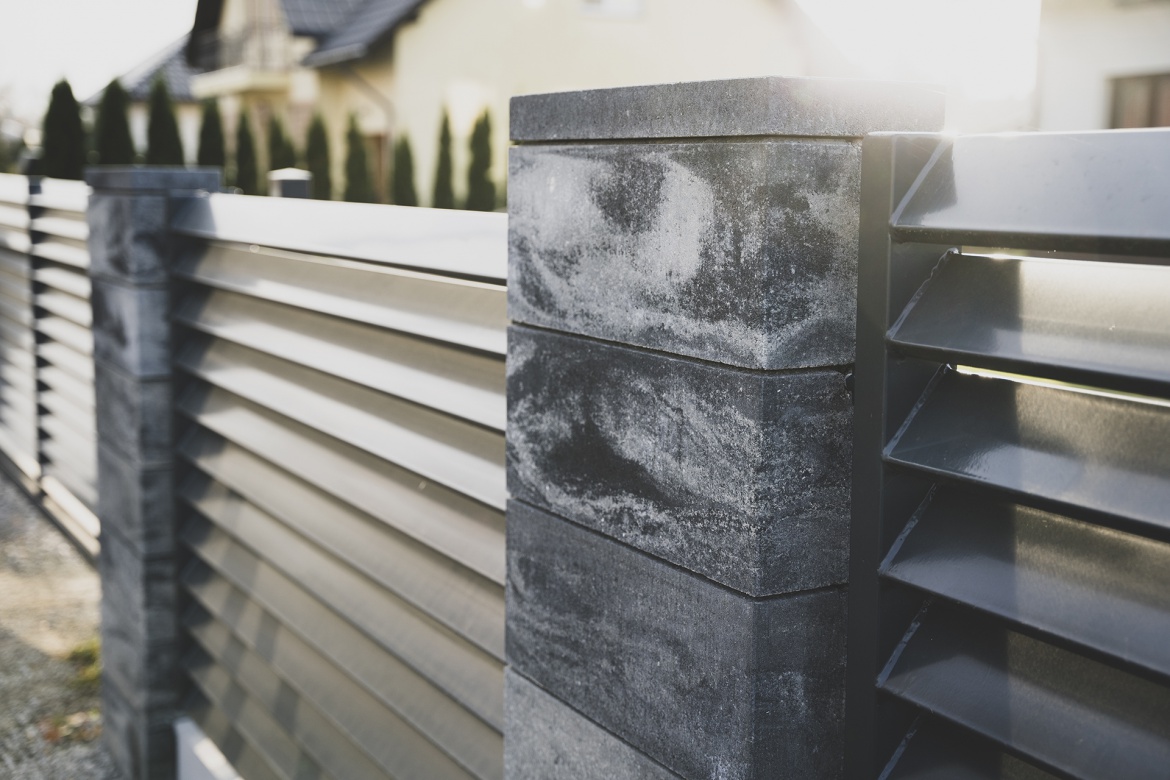
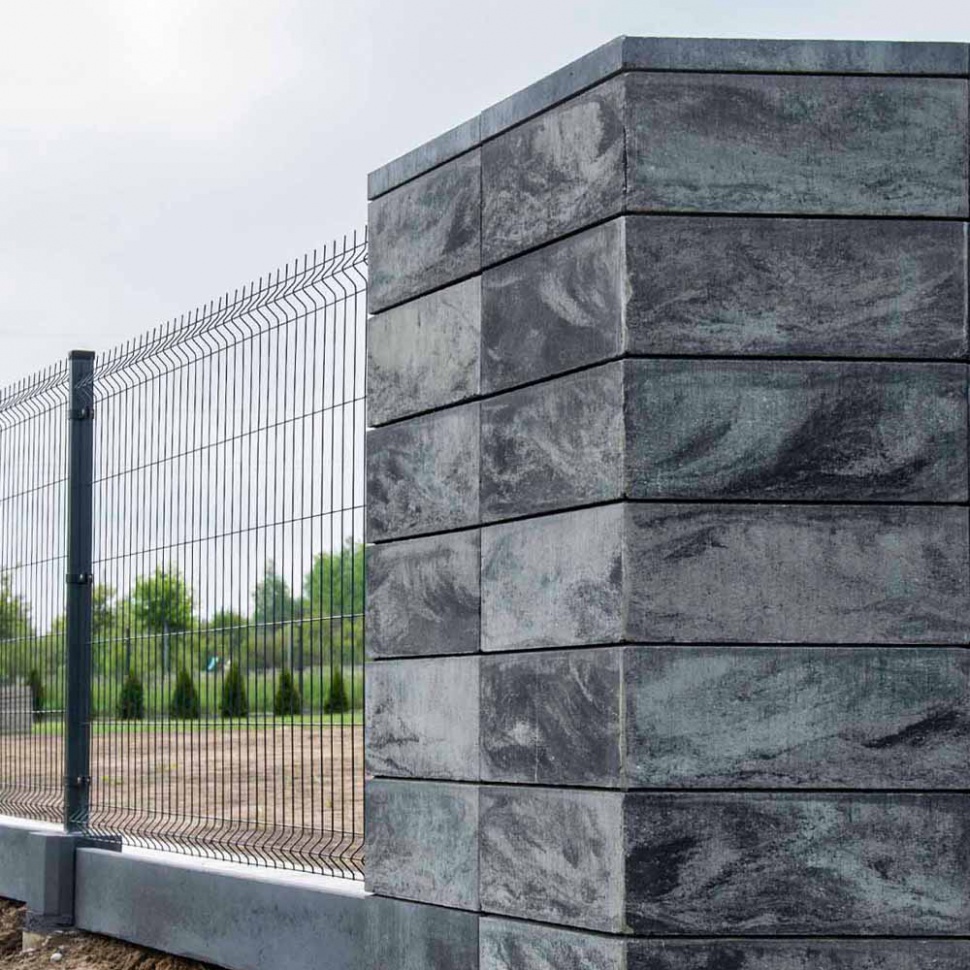
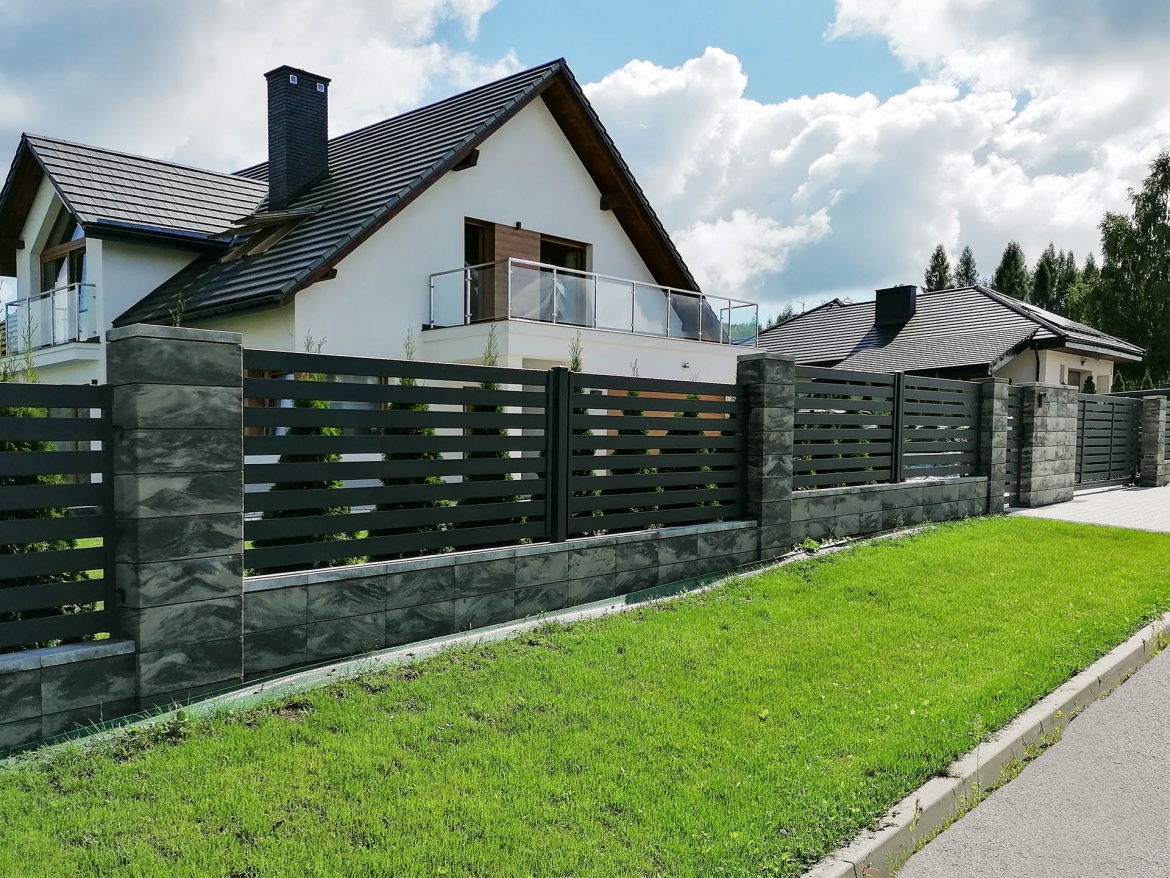
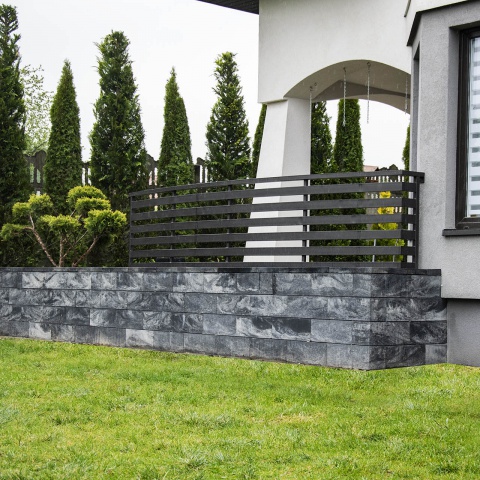
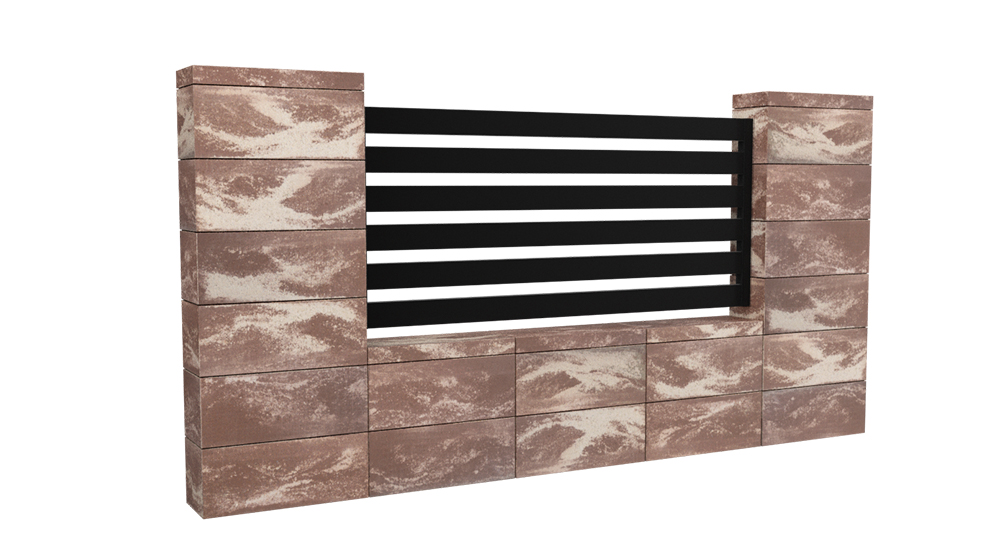
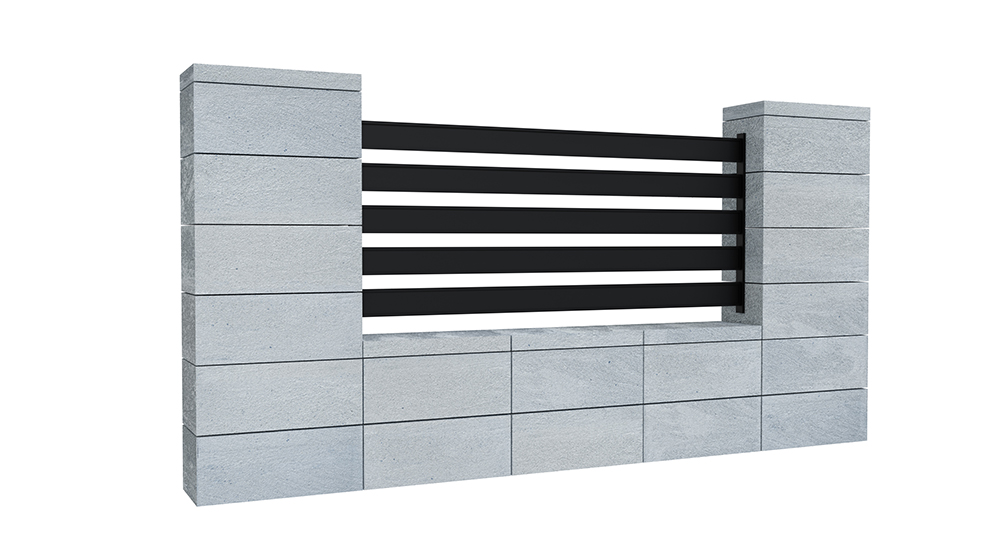
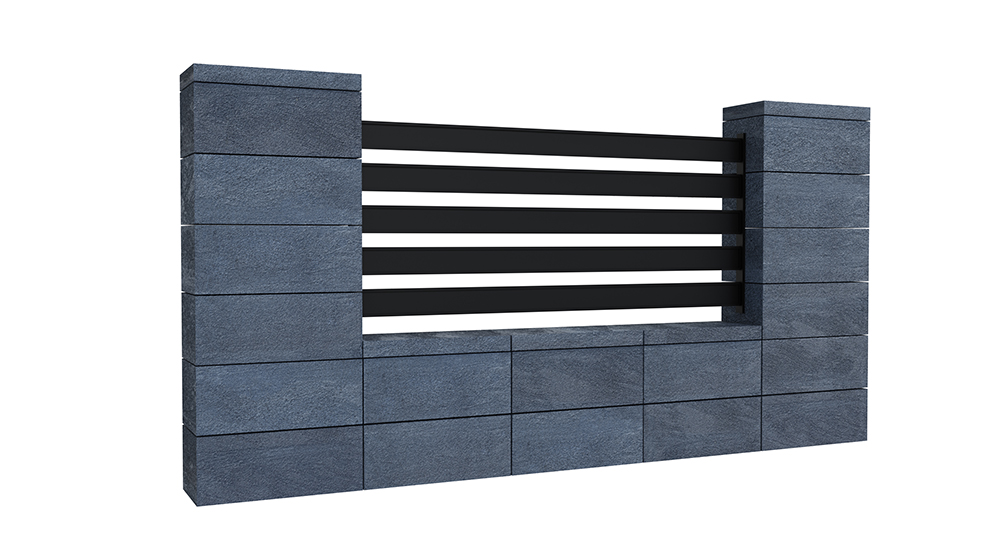
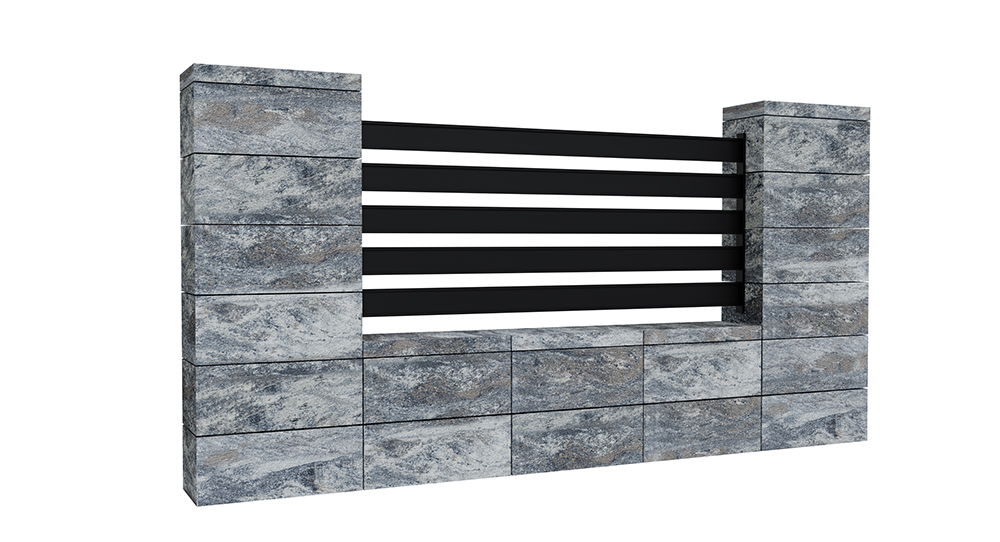
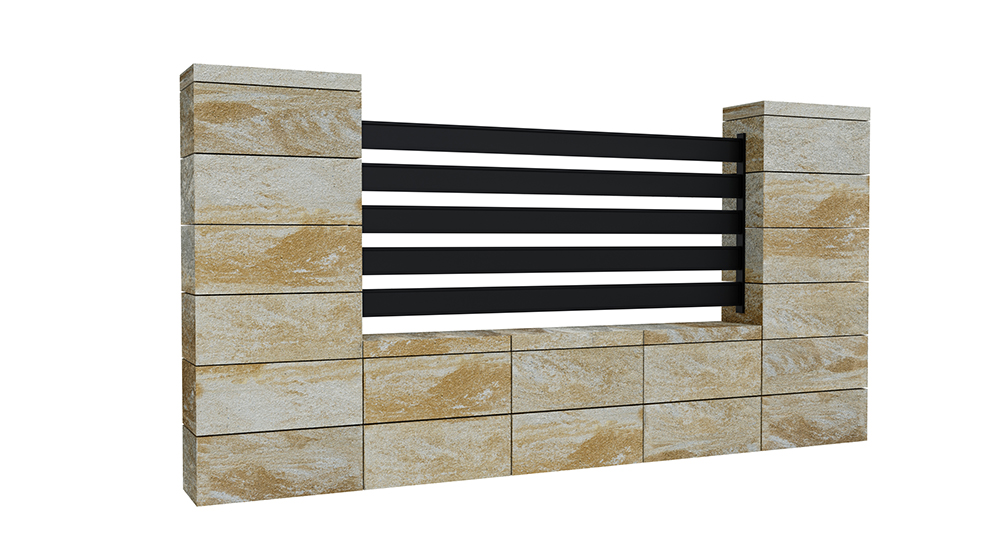
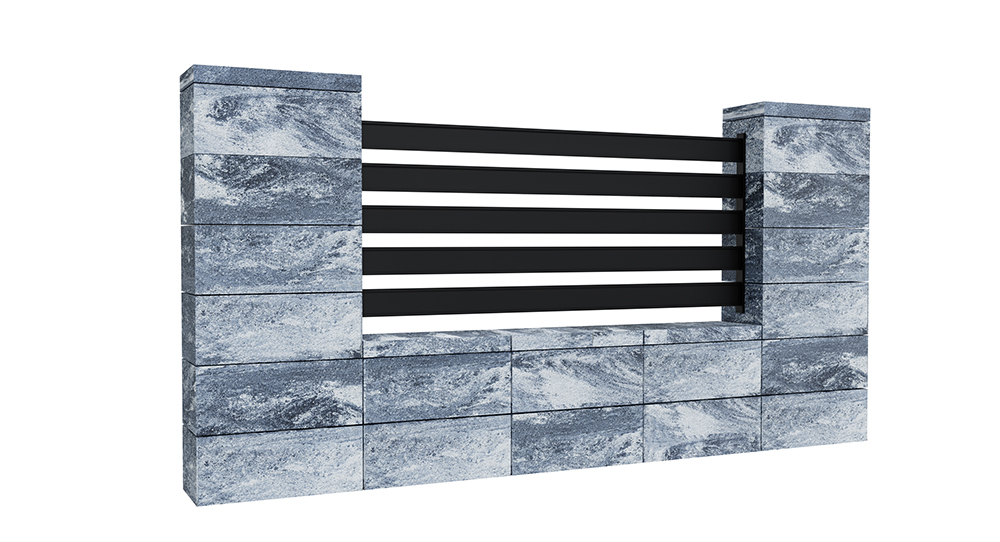
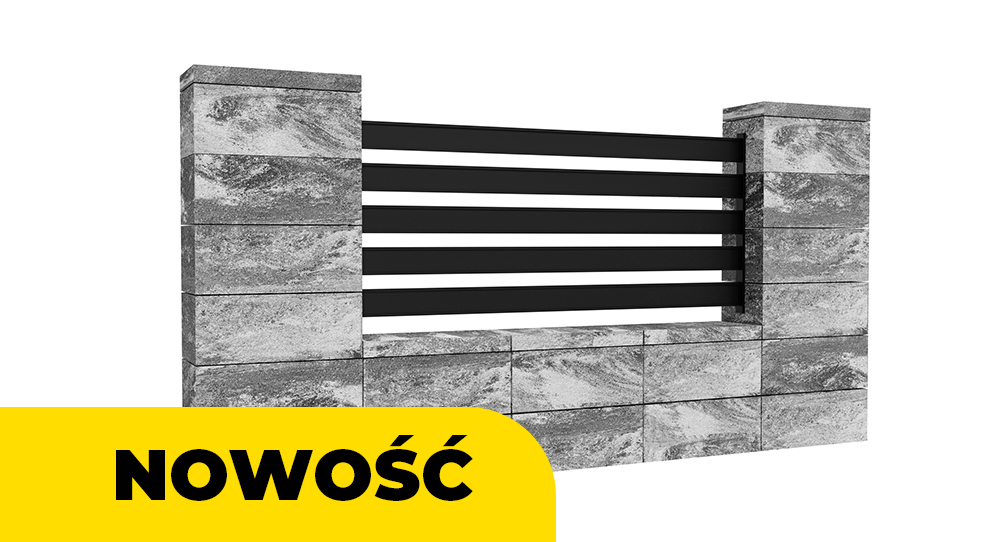
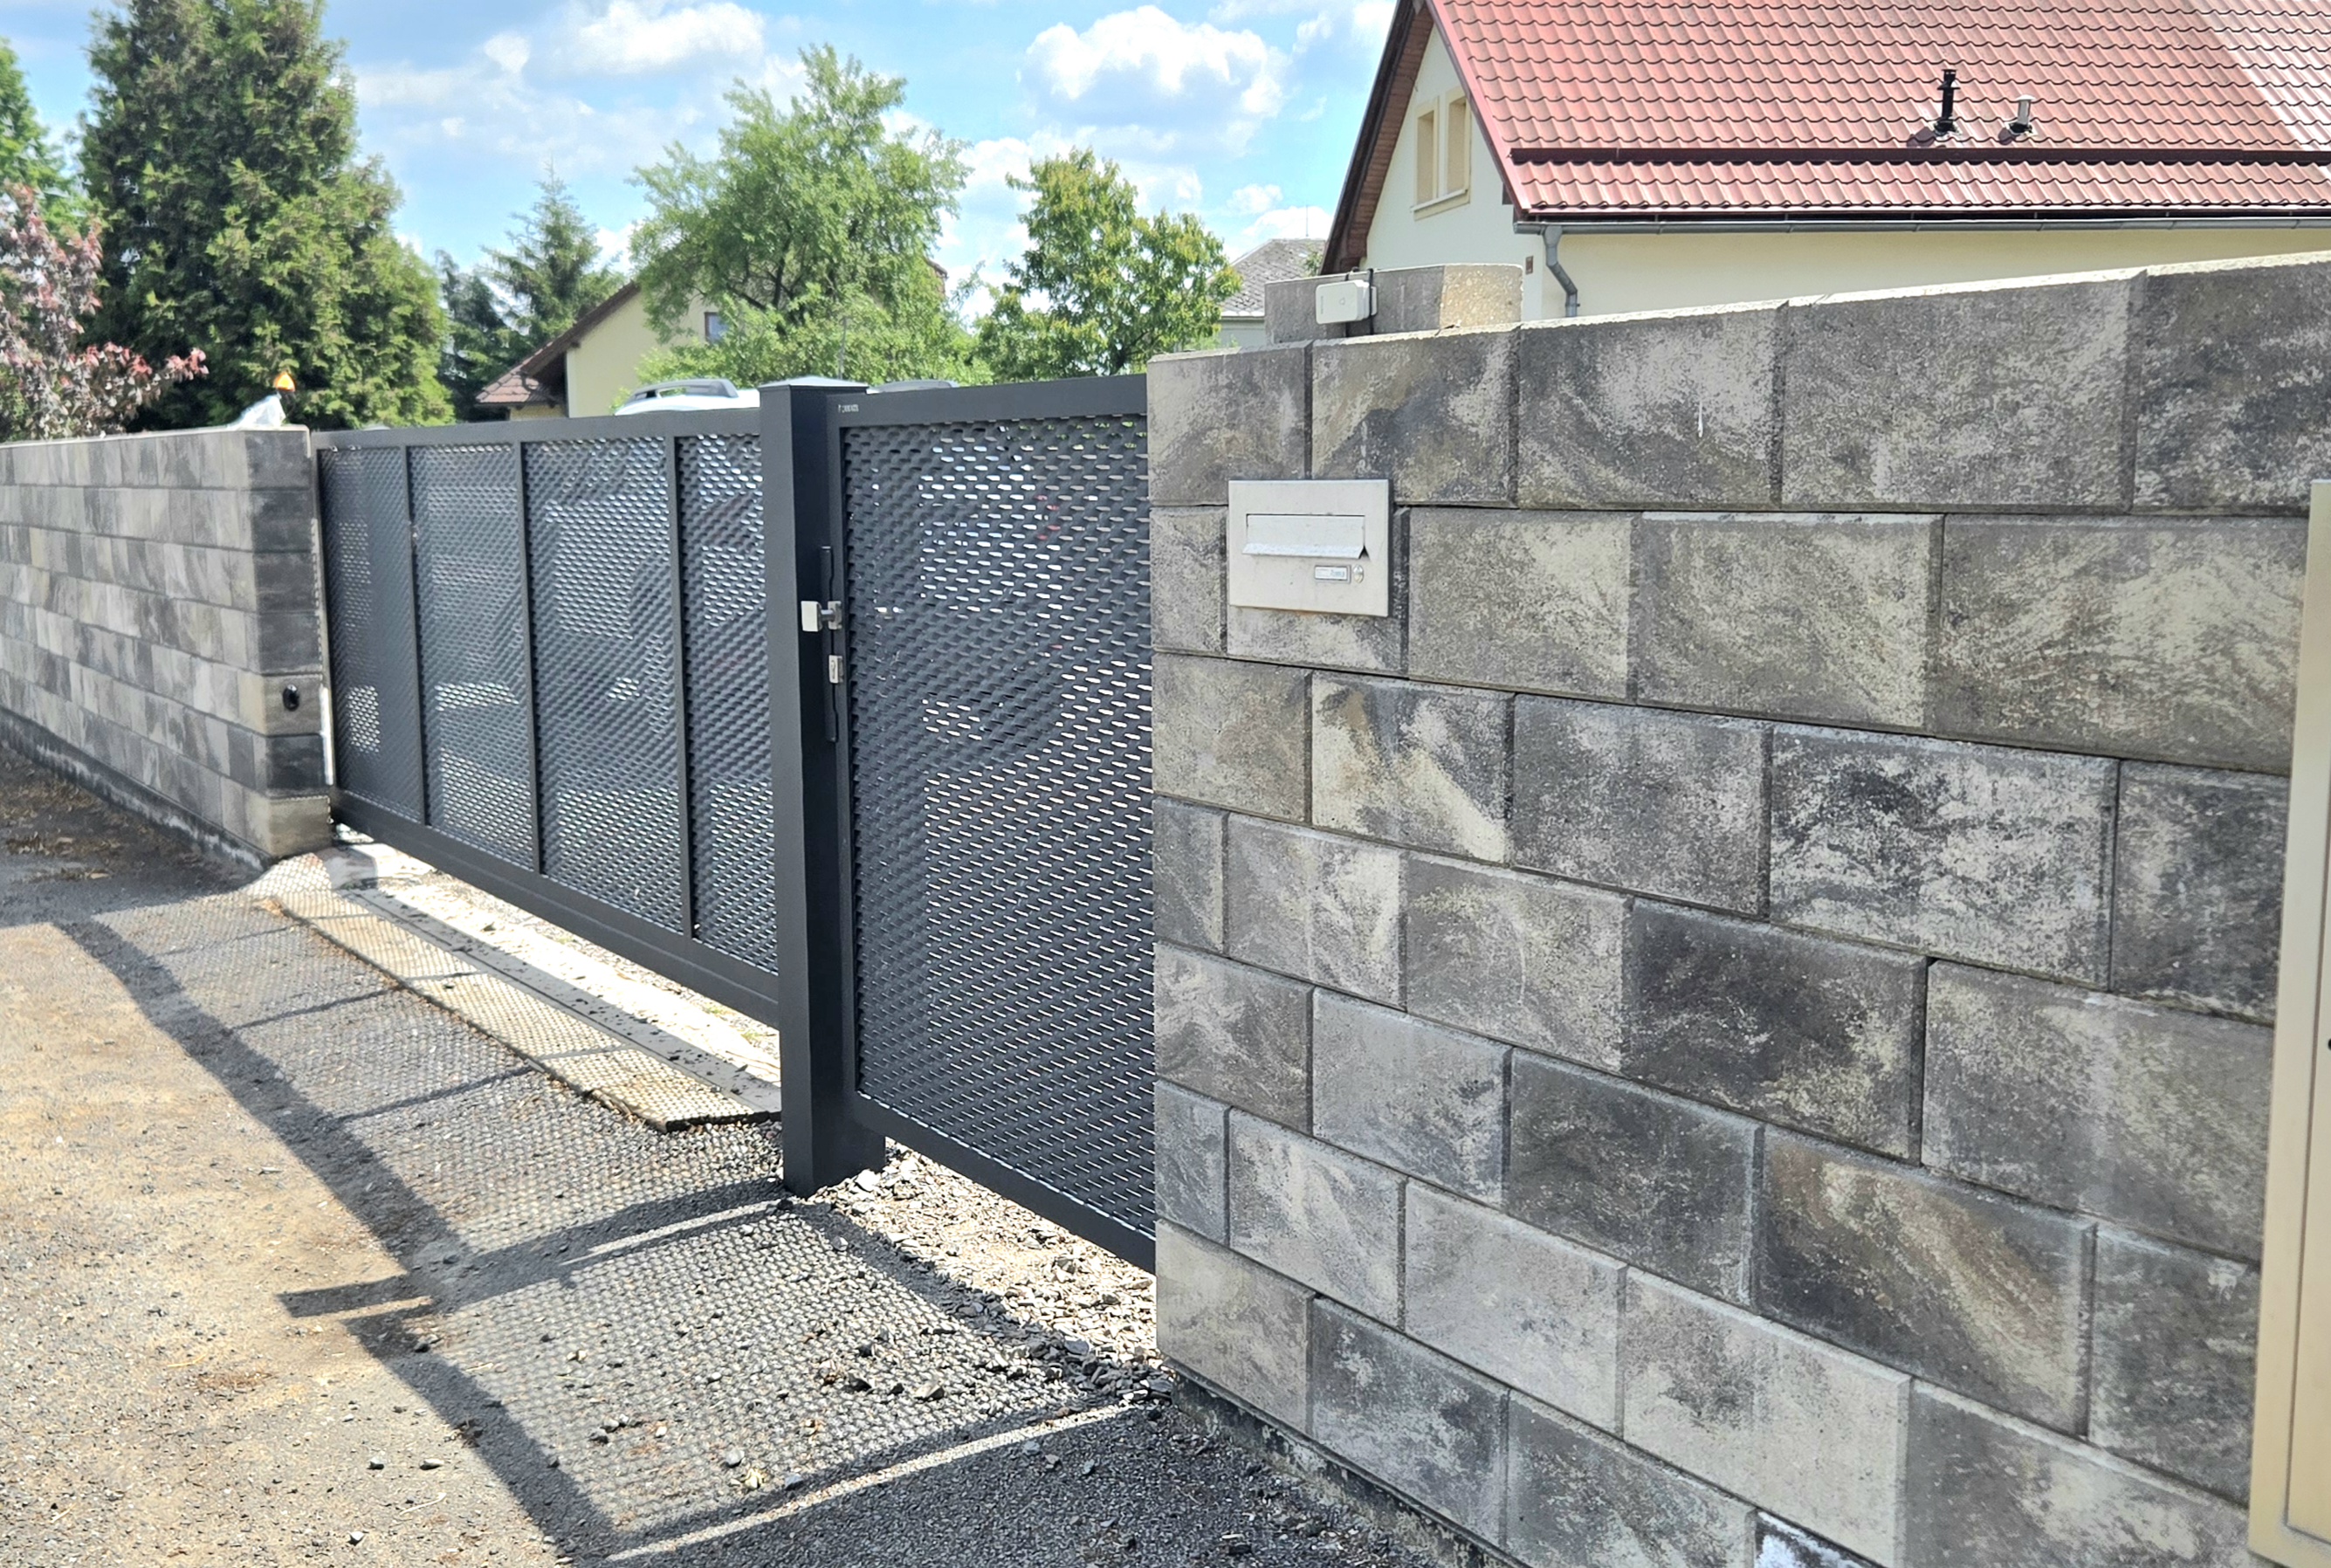
Smooth Fence - Fini™ The smooth (modular) concrete fence Styrobud Fini™ is a product that enjoys extraordinary popularity. It fits into the latest trends and is currently the most frequently chosen method of fencing.
Styrobud Fini™ is made of smooth modular blocks. The versatility of our fence allows the client to assemble it according to their needs. your own preferences: the fence will work well as a low foundation, a medium wall with spans or as a high fence providing peace and security. Our smooth (modular) Styrobud Fini™ fence always blends in with the surroundings. Individual blocks of our system can be used as elements of small architecture – flower pots, walls, palisades.
The FINI smooth fence is the ideal solution for people who appreciate minimalist design, durability and high quality workmanship. Thanks to the use of exposed concrete, it is characterized by a perfectly smooth surface and a uniform structure, which gives it a modern and elegant look. It fits perfectly with both modern and classic architecture and ensures aesthetics and privacy at the highest level.
Why choose FINI fencing?
✅ Modern design - smooth surface and minimalist shape fits any arrangement.
✅ Durability and resistance - high-quality concrete provides resistance to weather conditions, moisture and mechanical damage.
✅ Easy assembly - modular design allows for quick and easy assembly.
✅ Versatility – will work well on both private land and public spaces.
✅ Requires no maintenance - exposed concrete does not require additional impregnation or coating.
Choose elegance and durability – choose a smooth FINI fence and create a harmonious space around your home!
INSTALLATION AND USE INSTRUCTIONS
This document contains important information, tips and warnings. Please read it carefully before carrying out any work on laying hollow brick fencing.
EACH USER (CUSTOMER) IN POSSESSION OF A PRODUCT MANUFACTURED BY THE COMPANY "STYROBUD" SHOULD READ THE CONTENTS OF THIS DOCUMENTATION AND ASSUME THEIR RESPONSIBILITY FOR COMPLIANCE WITH IT.
FAILURE TO FOLLOW THE INFORMATION AND USER INSTRUCTIONS CONTAINED IN THIS DOCUMENT MAY CAUSE THE LOSS OF THE WARRANTY AND THE WARRANTY ON THE DURABILITY OF THE PRODUCT. THE PRODUCT SHOULD BE INSTALLED AND USED IN ACCORDANCE WITH THE PROVISIONS OF THIS DOCUMENTATION AND ANY DOUBTS IF PROBLEMS ARRIVE THAT ARE NOT CONTAINED IN THIS DOCUMENTATION SHOULD BE REPORTED TO THE COMPANY "STYROBUD".
The company "STYROBUD" recommends preparing a technical and visual design for the fences. The design should take into account the type of load and operating conditions in accordance with the intended use of the product, the geotechnical parameters of the original soil, the correct design of the foundation and the conditions set out in separate building regulations.
Fences that are not designed for specific loads can be damaged regardless of the material they are made of. In extreme conditions, concrete fences can suffer from numerous cracks, and the causative factor will be incorrect installation of the foundation and assembly errors. STYROBUD recommends that fences be installed by professional companies with professional experience in this industry and appropriate to the scope of the project.
ATTENTION!
Before starting work, check whether the blocks provided by the manufacturer are compatible with the placed order and the data on the WZ delivery note, and also whether the blocks filled from different production batches do not differ significantly in color (this applies in particular - Attention! Please note that since natural components are used for the production of concrete products and may also appear due to changing weather conditions, color differences in shades of one color and slight differences in the uniformity of the structure. This is due to the variable properties of both the aggregates and the cements used for production. To compensate for potential shade changes and ensure uniform color distribution, it is recommended to manufacture fences from several materials of the palette at the same time.
PLANNING
Before you start building a fence, it is most important to plan it well - pay special attention to the arrangement of the gate and gate posts (taking into account the possibility of their opening), as well as the appropriate arrangement of elements in the fence, such as: a gatekeeper, a mailbox or connection and meter boxes for individual utilities. Accurate planning of the fence will allow for the correct construction of the foundation and the purchase and preparation of the appropriate number of hollow bricks. Carefully carry out the planning stage of the fence, it will facilitate the work in each subsequent step of building a fence from concrete blocks.
PREPARATION OF THE FOUNDATION
The first stage of fence construction is the manufacture of the foundation footing. The width of the bench depends on the width of the selected block. The footing should be made along the entire length of the fence (with the appropriate arrangement of the gate posts and spans), and its depth should depend on the height of the planned fence and, above all, should reach below the ground frost zone. Depending on the region of Poland, this zone is from 80 to 140 cm. This is an important parameter, because it can cause freezing of groundwater in winter damage to the foundation and, consequently, the entire fence.
The exact determination of the depth of the ground frost zone depends on the investor.
When building the foundation, it is necessary to take into account vertical expansion joints on average every 10-15 m. It is recommended: expansion joints were made at the junction of the wall and the post. Please remember, make an extension of the cut in the blocks located above the gap. The gap must be made along the entire height of the fence and then filled with non-absorbent material and permanently elastic sealing material. Such adjustments will prevent cracking of the fence elements in case of any movements of the foundation.
Horizontal and vertical reinforcement should be placed in the foundation being built. The task of horizontal reinforcement is to stiffen the foundation, which provides additional protection against cracking of the elements. Vertical reinforcement should be placed in the corners of the designed column core.
The type and quantity of reinforcement should be selected in accordance with the applicable standards and guidelines for designers. Horizontal and vertical reinforcement can be tied together, which will prevent the movement of the reinforcement bars when pouring the foundation with concrete. Before pouring concrete into the excavated foundation, formwork should be made - especially in situations where the soil is loose and crumbling. Formwork will prevent the soil from pouring into the excavation, due to which the concrete will not mix with it. Concrete for the foundation should comply with the PN-EN 206 standard, which is intended for use for many types of foundations with a concrete class of at least C25/30 and an exposure class of XC2. Concrete based on gravel and high-quality washed sands and Portland cement CEM I, without mineral additives, should be used. If an individual design is used to manufacture the fence - then the instructions contained in them must first be taken into account. The formwork should be removed 2-3 days after pouring the foundation with concrete. Before proceeding with further work, it is recommended to check the foundation for any irregularities and repairs. After the concrete has reached its full strength, it is recommended to place a lightweight insulation on the level foundation (base insulation foil), which will limit the capillary rise of water from the ground and subsequently prevent the formation of lime efflorescence and cracks caused by frost.
BEFORE STARTING INSTALLATION
Before you start installing the fence, you must first install each fence, lay its layer "dry" (starting from the corners), matching the individual blocks to each other. You need to arrange the blocks so that they fit tightly to each other and there are no deviations either vertically or horizontally. Possible deviations from the level can be leveled by grinding hollow bricks or laying wedges.
When building a fence, pay attention to: arrange the colors in each block and then mix, arrange them in such a way as to obtain the most beautiful melange. The best effect is achieved by mixing blocks from several palettes (at least 4) so that one color does not become saturated in a given area. In the case of split hollow bricks, it is also recommended to select elements in such a way as to obtain: a suitable masonry surface. For the construction of posts for gates and wickets, it is recommended to choose hollow bricks with the least wavy (bulging) surface. We remind you that colormix colored fence blocks imitate natural stone and their characteristic feature is the unique and individual color of each block, which cannot be perfectly reproduced.
FENCE INSTALLATION
The fence should be laid in layers - the first layer of hollow brick is worth laying on mortar. Connect the hollow blocks using a frost-resistant and waterproof vertical joint (made, for example, from assembly glue or roofing silicone) so that they do not move when pouring concrete and all joints remain properly sealed. The hollow blocks should not move until the applied joint dries (approximately 4-5 hours). As an additional protection against movement of the blocks. When pouring concrete, you can use polypropylene tape. Preparation for pouring concrete into hollow blocks. Before pouring concrete into hollow blocks, the manufacturer recommends installing permanently inserted spacers of flexible material 4-10 mm thick in the block chambers. As a material for spacers, e.g. polystyrene or primer can be used. The blocks should be poured in layers - 1-3 layers at a time. When pouring concrete mixture into hollow bricks, do not forget to remember the appropriate density (usually in the form of hand engraving using a wooden square or metal rod). Do not forget to thoroughly compact the concrete in the chambers so that they are tightly filled - this is the basis of a permanent fence. When compacting, it is advisable to carefully compact it so that the mixture does not segregate. It is forbidden to add water to the prepared mixture, as this will reduce the strength and durability of hardened concrete and a general decrease in quality. Any dirt that arises during installation work must be removed continuously, or the assembly adhesive may remain permanently (or cause damage to the element during the removal of these residues after a long time) and significantly spoil the resulting visual effect.
CARE
After pouring the concrete into the hollow blocks, the fresh mixture should be protected from attack by weather factors (too much sunlight, rain, frost, wind), depending on the season and prevailing conditions. It is recommended to cover the fresh mixture with a protective film to protect it, prevent the evaporation of water from the mixture. The use of the cover should be carried out until the fence is completed with canopies or at least for 7 days.
INSTALLATION OF DEVICES
Gluing of roofs should be started at least 7 days after the completion of work related to pouring concrete into hollow blocks. The place where the block and the roof join together should be sanded. The visors should be mounted on frost-resistant and deformable glue. There are gaps between the roofs and between the roofs and the hollow bricks should be sealed with a suitable preparation - this will ensure the protection of the hollow brick chamber against access to moisture. To prevent the appearance of dirt on the roofs and against the growth of moss, they can be impregnated or painted with a suitable paint for concrete.
INSTALLATION OF PANELS, GATES, WITTERS
Spans, gates and wickets should be installed with special care, taking care not to damage the fencing blocks. Holes should be drilled in the posts in such a way that the elements are anchored with fasteners into the concrete core. The holes created should be tightly filled with roofing adhesive or silicone to protect the post against water migration into the core. The above elements should be installed in accordance with the manufacturer's guaranteed installation instructions. To reduce the risk of damage or cracking of the blocks, avoid fixing the spans at the block-core joint. If in doubt about the installation of the spans, contact their manufacturer or use the services of an experienced contractor.
Correct focus is important
Once you have chosen the type of wall or fence that will perfectly suit your house, you can start with the implementation. The easiest way is to contact an experienced implementation company that will help you with the selection, calculation and, of course, with the construction. If you decide to make your dream come true without the help of experts, we recommend reading the instructions and watching the instructional videos. First, carefully measure the plot, not only the distances, but also the elevation. Those who are more mathematically able will certainly be able to calculate the material, but if you need advice or consultation on consumption, technical specialists from paving and fence suppliers will be happy to help you.
Workflow – how to build a fence
On the treated base, we apply a cement bed for the first row of concrete fittings. We align the fittings vertically and horizontally so that the top edge is perfectly straight. Then we fix the fittings by concrete them to a height of approximately ½ the fitting. We pour concreting into the previously moistened inner cavity of the fittings with a moist concrete mixture, minimum strength class C20/25. Under no circumstances do we use liquid concrete to fill the fittings. It is very important to compact the concrete mixture with a 10×10 cm tamper so that the top surface of the concrete is moistened during compaction.
Then, we place another layer on top of the first layer of fittings, which we level again vertically and horizontally. We pour this layer with filling concrete to 2/3 of the height of the fittings and compact it again. We do each subsequent row in the same way. We must not forget to continuously adjust the vertical reinforcement so that the individual fittings are connected by the reinforcement at their entire height and at the same time at the entire height of the fence. We level any height tolerances of the fittings with wedges. The layer of concreting and each compacted height should not exceed 15 cm. In the last row of fittings, we leave a free unfilled space, approximately 5 cm from the upper edge of the fitting.
Concrete pouring requires precision and care
Concreting requires due attention and care. It is not a simple filling of the cavity with concrete sand, it is the creation of a masonry monolith. This will give the entire structure strength. If you perform poor internal concreting, the concrete mixture will not connect with the fitting itself and the reinforcement, and the fitting will then serve as a hollow masonry. Accordingly, it will not last very long, and may even crack if climatic conditions change. We finish the entire structure of the fittings with cover plates, mounted on frost-resistant glue. We use silicone to seal the contact surface of the continuous under-masonry plates.
Now you can easily imagine whether you can handle the construction yourself or contact a construction company.